Subscription, Seats & Invoices
The Billing page is your home for day-to-day billing management. From one place you can check your current plan, manage how many seats your team has, and find your invoices and payment details.
Billing is available from your user menu. Managing your plan and seats is typically a Workspace admin task.
Opening Billing
To get to Billing:
- Sign in to Medullar.
- Open your user menu (your avatar, on the right of the main navigation). Your current plan is shown here.
- Select Billing.
The Billing page is organized into three cards: Plan, Seats, and Invoices.
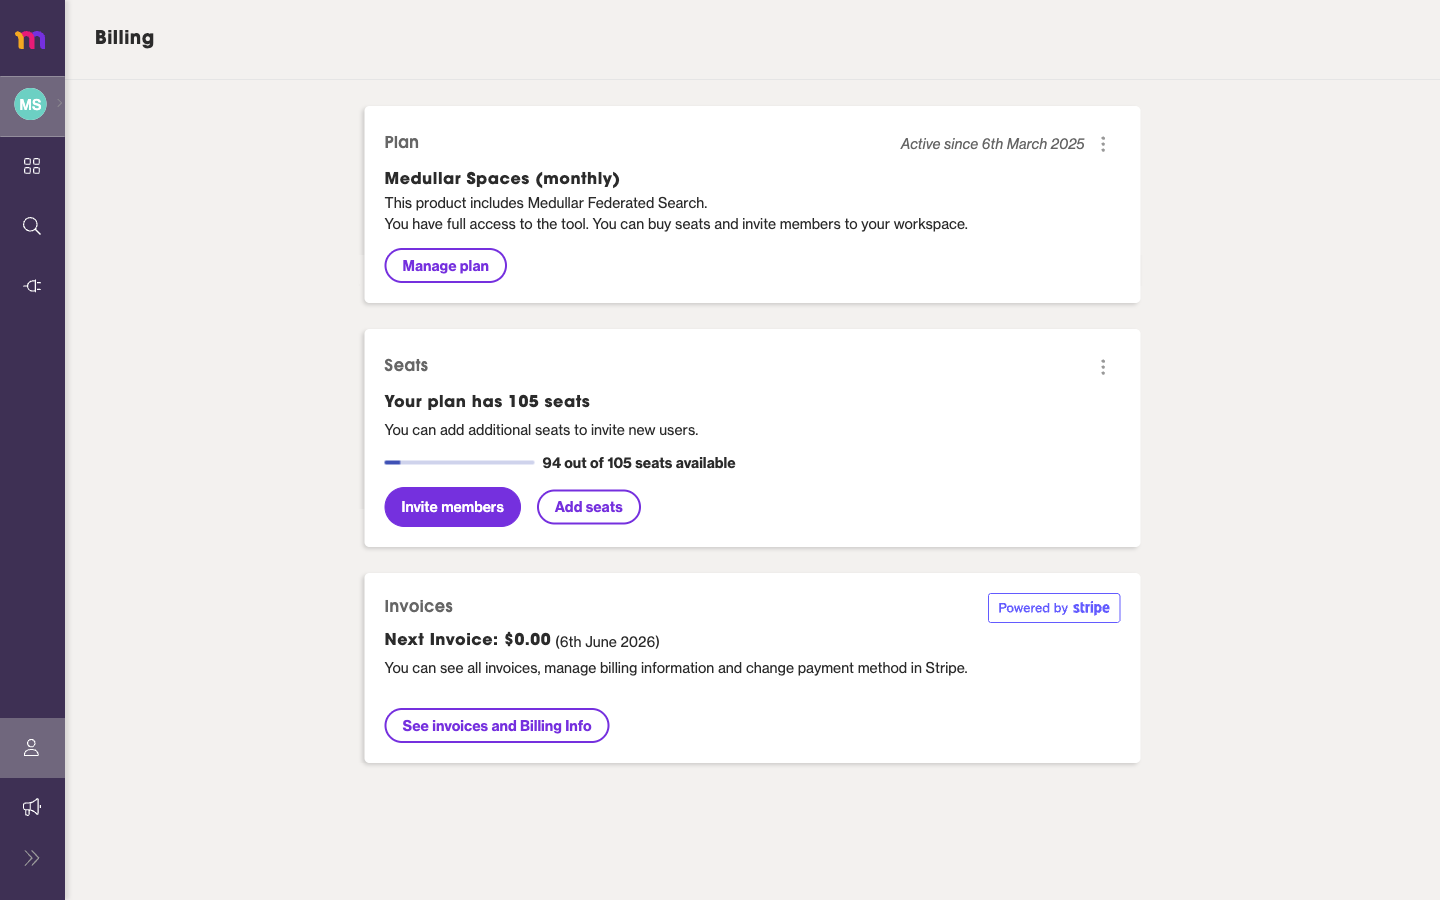 Plan, Seats, and Invoices, all on the Billing page.
Your plan
The Plan card shows the plan your workspace is on (for example, “Medullar Spaces (monthly)”) and the date it has been active since.
- To change, compare, or cancel your plan, select Manage plan.
For upgrading, comparing options, and cancellation details, see Plans, Upgrades & Cancellation.
Seats: adding and inviting
A seat is one place on your plan for a workspace member. The Seats card shows how many seats your plan includes and how many are still open, displayed as X of Y seats available.
From the Seats card you can:
- Invite members — add a teammate to your workspace. Each invite you send consumes one seat.
- Add seats — increase the number of seats on your plan when you need room for more people.
If you run out of available seats, add more before inviting additional members. For roles and the full member list, see Workspace Members & Roles.
Invoices and payment (Stripe)
The Invoices card shows your next invoice and a link to your full billing history.
- Select See invoices and Billing Info to view past invoices and manage your payment details.
Invoices, billing information, and payment methods are handled in Stripe (you’ll see it noted as powered by Stripe). Selecting See invoices and Billing Info opens the Stripe billing portal, where you can download invoices and update how you pay.